Are you looking for a way to save money on new tires? Heat cycling is a great option if you want to extend the life of your tire without investing in a brand-new set.
If you’ve ever been a keen cyclist, you’ll know that the tires are essential to an enjoyable ride. Tires act as shock absorbers, protect against daily wear and tear on the bike, and, most importantly, ensure your ride is smooth and responsive.
However, few cyclists stop considering the impact of tire maintenance on their rides – particularly how heat cycling can improve tire performance. Heat cycling tires help increase their lifespan, so they need less frequent replacing - ultimately saving money in the long run - while providing greater traction and control during challenging rides.
In this blog post, we'll take a look at exactly how to heat cycle tires!
To heat cycle your tires, you’ll need a few essential items:
Once you’ve gathered all of your materials, you are ready to start the process.
Before you begin the process, ensure your tires are fully inflated. This will ensure even heating and prevent any damage to your bike or tire. You can use a floor pump or other tool to inflate your tires to the recommended pressure level.
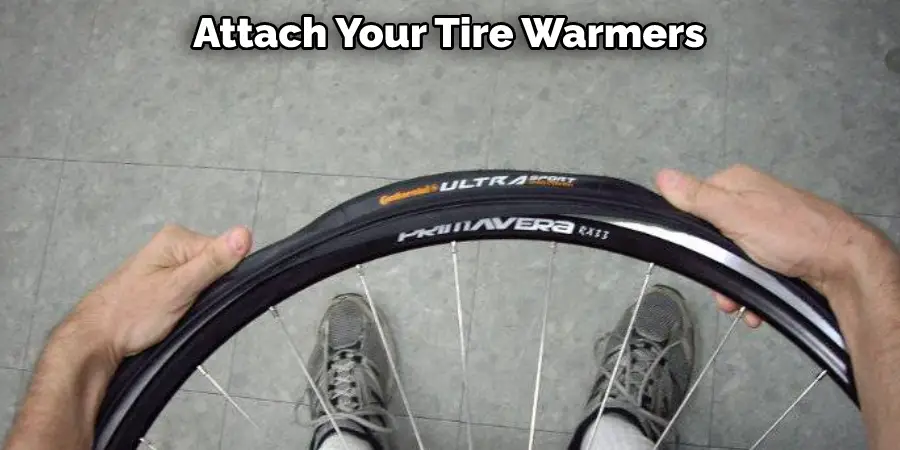
Next, attach your tire warmers to the inside or outside of your tires. Make sure that the pressure from the warmers is evenly distributed across the surface of each tire. Leave them on for at least 10 minutes before moving on to the next step.
After your tire warmers have been in place for at least 10 minutes, double-check that your tires are still inflated to the recommended pressure level. This is important to ensure even heating throughout your tires. If you notice that the pressure has decreased, use your tire pump to inflate it back up.
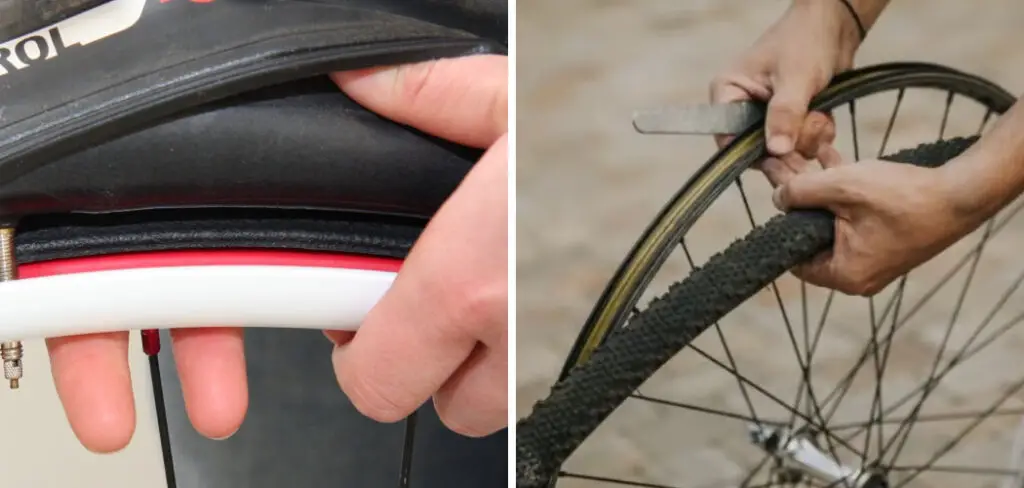
Once your tires have been heated for at least, carefully check the surface of each tire for cracks or other damage. If you notice any issues, stop the process and repair any damaged areas before continuing. You will also want to ensure that there are no foreign objects in or around your tires, as these could cause unexpected punctures or other damage during the cycling process.
If desired, apply tire sealant to each tire before beginning the heat cycle process. This helps prevent punctures during treatment and will help keep your tires performing well for longer. Be careful to apply the sealant evenly across the surface of each tire.
With your tire sealant in place, you can now begin mounting your tires onto your bike. The exact method for doing this will depend on the bike you have and the style of tires you are using. However, careful installation is essential to ensure even heating during cycling.
Once your tires are securely mounted, it’s time to start cycling! Begin by slowly increasing the pressure on your pedals until you reach a comfortable speed – about 15 miles per hour should be sufficient. Maintain this speed for at least 10 minutes before reducing pressure or stopping completely. If any issues arise during cycling, stop immediately and address the problem before continuing.

After cycling, check your tires carefully for any leaks or cracks that may have developed during the process. If you notice any issues, immediately stop cycling and repair the damaged area using a tire sealant or puncture repair kit. Don't continue cycling until your tires are in good condition.
When you are done heat cycling your tires, it’s important to store them properly for future use. This means removing them from your bike and letting them slowly cool before storing in a dry place out of direct sunlight. You may also choose to apply additional tire sealant at this time to further protect against future leaks or damage.
Finally, remember to avoid overheating your tires during future use. This can cause damage and decrease the overall performance of your tires over time. Monitor tire pressure closely and be sure to stay within recommended limits for best results. It will take a bit of practice to get the hang of how and how long to heat cycle tires, but with some time and patience, you can extend the life of your bike tires and enjoy optimal performance every time you ride.

If you want to keep your bike performing at its best and extend the life of your tires, it is important to know how to heat cycle them properly. Following these ten steps, you can safely cycle your tires and enjoy a long-lasting, high-performance riding experience.
1. Before beginning the heat cycling process, it is important to inspect your tires for any cracks or damage. If your tires are in poor condition, they may not be able to withstand the high temperatures required for heat cycling.
2. Make sure that you have a strong surface on which to place your tires. You will need something sturdy and flat, such as a piece of concrete or a workbench, that can support the weight of your tires throughout the entire heating process.
3. It is also important to ensure adequate ventilation in the room where you are performing heat cycling. During this process, significant amounts of steam and smoke will be produced from your heated tires, so adequate ventilation is crucial for safety purposes.
4. It is important to monitor the progress of your tires throughout the heat cycling process and adjust the temperature accordingly. You may need to increase or decrease the temperature depending on how quickly your tires heat up.
5. Finally, allowing your tires to cool down properly after heat cycling is crucial. If you do not let them cool down slowly, there is a risk that they could crack or become damaged from sudden changes in temperature. To avoid this, be sure to let your tires sit for at least 24 hours before using them again.
With these tips and tricks in mind, you can successfully heat cycle your tires and enjoy a better performance on the road.
1. Always wear proper safety equipment when heating and cycling your tires, such as a helmet and protective gear. This is especially important if you are working with hot materials or in an area where there may be sparks.
2. Be sure to follow all manufacturer instructions when heating and cycling your tires. This includes using the proper tools and ensuring that your workspace is well-ventilated to avoid harmful fumes and gases.
3. Maintain a safe distance between yourself and any heat source while heating cycling your tires, and always keep a fire extinguisher or other emergency response kit nearby in case of an accident.
4. If possible, have another person present while you are heating and cycling your tires to provide additional support and help in the event of an emergency.
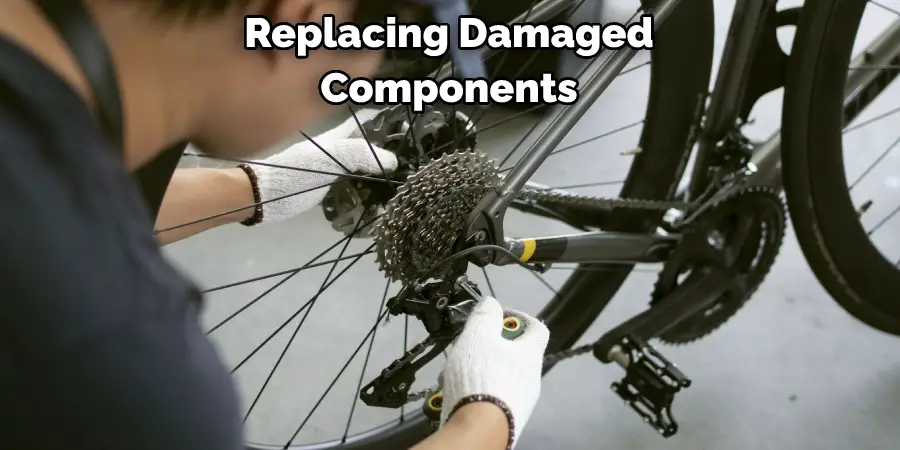
5. If you notice any signs of overheating, such as burned or melted rubber, discontinue heating cycling immediately and take steps to prevent further damage to your tires. This may include cooling them down, replacing damaged components, or seeking professional repair services.
With proper care and attention, however, you can safely heat cycle your tires for improved performance and longer wear.
Following these steps will ensure that your tires are properly heat cycled and ready to take on whatever you throw at them. Whether you're a weekend warrior or a professional racer, ensuring your tires are up for the challenge is critical to performance. With a little bit of planning and preparation, you can be confident that your car will be able to handle anything you ask of it.
Now that you know how to heat cycle your racecar tires, you can get out on the track and practice! Be sure to check your tire temperatures often and make adjustments as needed. With a little time and practice, you'll be able to fine-tune your skills and set lap records in no time.
Hopefully, the article on how to heat cycle tires has been helpful to you. Whether you're a seasoned racecar driver or just starting out on the track, proper heat cycling is an essential part of getting the most out of your tires and ensuring they are safe and reliable. So get out there and start heating cycling today!